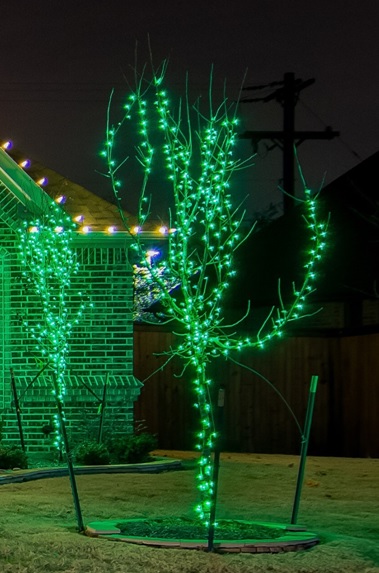
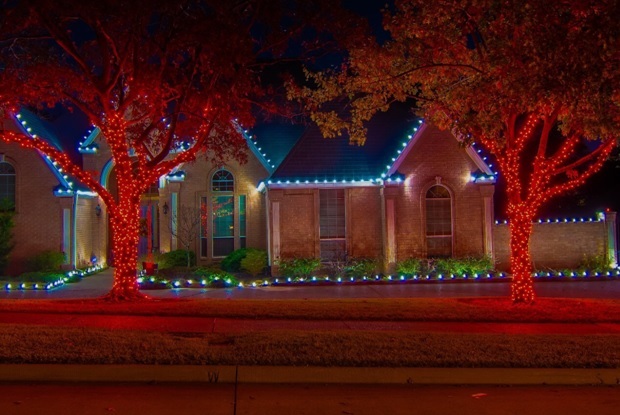
One of the most effective ways to create a stunning display with your outdoor Christmas lights is by wrapping trees and columns, and other similar structures like posts and poles. Fortunately, this is fairly easy to do and can create a beautiful visual arrangement quickly.
First you need to find the tree or column that you want to serve as a focal point; lighting it will really make the whole space come to life and it will naturally draw attention to itself. There are also different stages you can follow, whether you just wrap the trunk or light it all the way to the branch tips.
There are three main things you need to consider before wrapping a tree or column, regardless of the project.
The first is what type of lights you want to use for the project. There are lots of options in outdoor Christmas lights; we always recommend for our trees and columns, all different colors of 5mm mini lights.
The second is spacing - this refers to how wide you want your spiral wrap around the tree to be. Wide spacing will create darker areas between the gaps, but overly tight spacing will eliminate the spiral “barber pole” look. You should also consider the distance between lights on the strand when evaluating spacing.
The third thing to consider is how high up the trunk or column you want to go. With a column you have a defined top and bottom, but that’s not always the case with a tree, in which the trunk can split off into main branches in the crown.
The latter two considerations are pivotal in determining what length of outdoor christmas lights (in this case mini lights) you will need. Remember, it’s always better to have a little bit of extra linear length than too little. You can always trace back over the lighting you placed if you have extra, but you can’t do that if you’re short.
If you want to estimate the length of lights you need, you will need to know the length and circumference of the tree or column, as well as the spacing that you want to follow. For the purpose of this illustration, let’s just say that you have a 10’ high column with a circumference of 36”.
We’ll also be working with our 5mm which have 4” spacing for the purpose of this illustration. Take the height (in this case 10’ or 120”) and divide that by the spacing, 4”, to give 30, and take that and multiply it by the circumference, which is 36”. You’ll need 1080”, which is 90 feet.
To determine how many light strands you need, you will also need to know the length of the strand. Let’s say you’re using our 23’ mini light strands (they’re exactly 23.3’) - you’ll need about 4 strands, and you’ll have a little length to spare. Best of all, our energy-efficient mini light strands use so little electricity that up to 80 strands can be safely connected end to end.
Our pro tip is to start at the base of the tree or column; that way if you have any extra length left over on the light string once you can to the top, you can either double back down the trunk or column, or if lighting a tree, you can continue the strand down one of the branches.
Starting the project is super easy - just start winding the light strand around the trunk or column, applying a little bit of pressure to keep the strand tight, as this will prevent it from slipping downwards. You’ll need to wrap a little tighter around most columns than tree trunks, as the bark of a trunk will grip the lights a bit better.
Keep the line tight as you progress up the column or trunk, and when you get to the end of the strand you’re working with, plug in the next strand to continue working upwards.
Another pro tip: use a zip tie to shorten the mini light strand so that there isn’t a big gap between where the strands are connected. This will help maintain even spacing as you continue the project. Also, if you need a little help securing the light strand, you can add nails or staples to keep the strand in place.

If lighting the branches of a tree, and you intend to light more than one branch with the same string of lights, double your spacing. That way, when you get to the end of a branch, instead of jumping between branches, you can double back the mini light strand, fill in the gaps all the way back to the base of the branch, and then start tracing a new branch.
Once you’re done with your Christmas light decorations, take a step back and bask in the glow of your project - you’ve earned it!

Get Ready with Outdoor Christmas Lights and Accessories
Planning a column or tree lighting project? Take a look through our full collections of indoor and outdoor Christmas lights (and accessories) and get what you need today.
And, when your creation is complete, post it on your socials and tag us with @decoratorswarehouse for a chance to be featured!
