
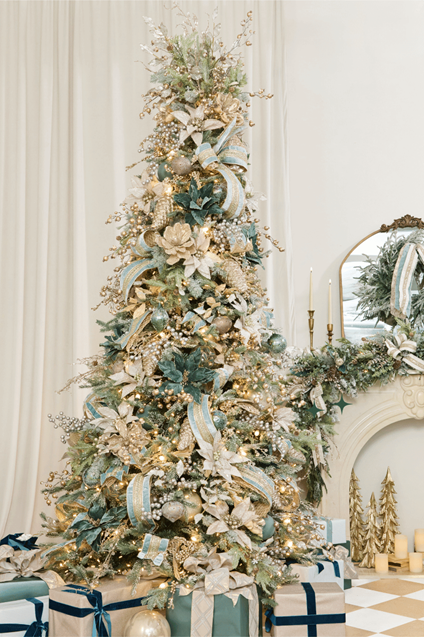
There’s something especially inviting about a Christmas tree filled with beautiful ribbon, glowing lights, and ornaments nestled among the branches. That lush, layered appearance brings warmth to the whole room, and creating it at home is easier when you know where to begin.
Learning how to decorate a Christmas tree to look full starts with shaping the greenery, then building your design with decorations of different sizes, textures, and depths. At Decorator’s Warehouse, we love helping you bring these elements together into a tree that feels beautifully coordinated and uniquely yours. Here’s how to give your Christmas centerpiece that abundant, designer-inspired look.
Choose the Right Christmas Tree Foundation
A beautiful tree gives your decorations a strong starting point. Before choosing one, measure your space for both height and width, leaving room for your topper and enough clearance around furniture and walkways.
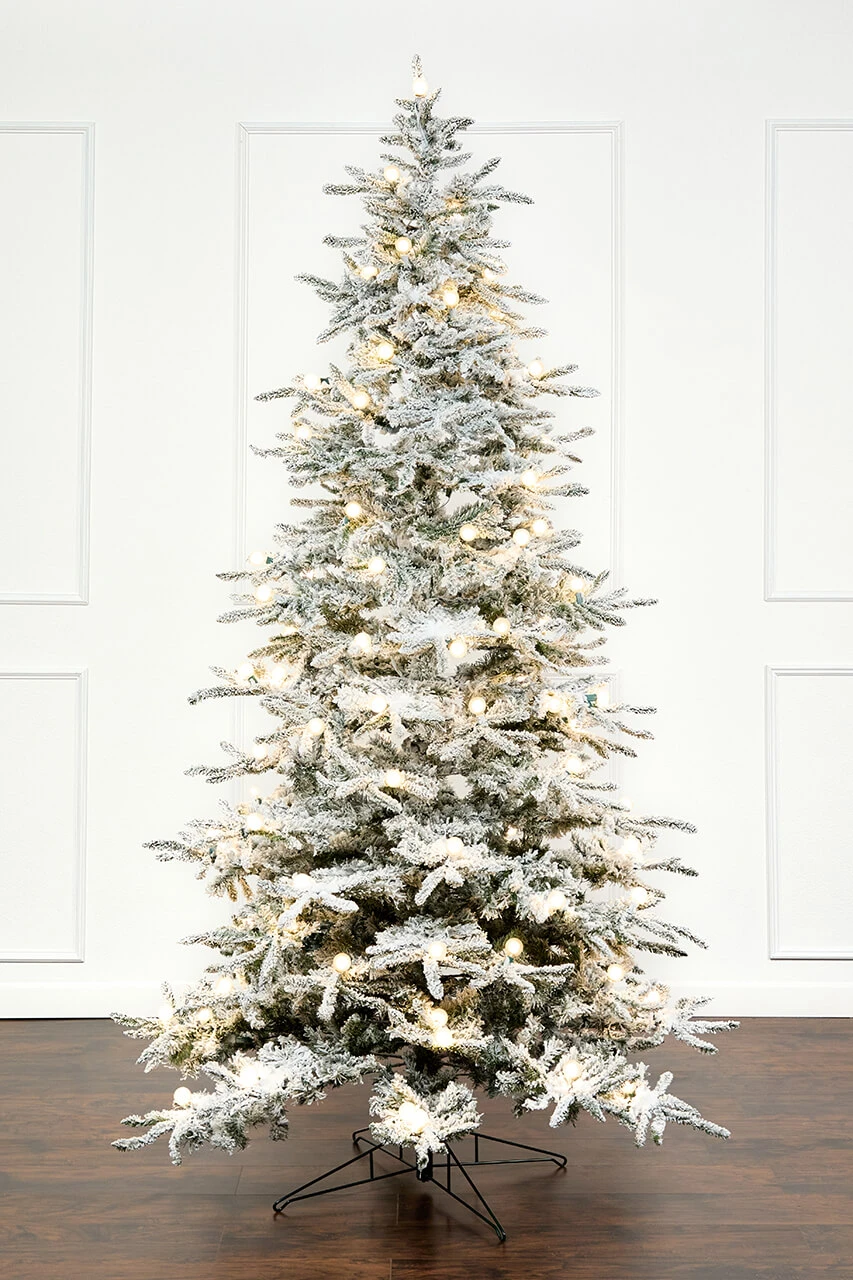
At Decorator’s Warehouse, we offer a variety of beautiful artificial Christmas trees to serve as the foundation for your holiday decorating. Explore traditional green trees, snowy flocked styles, prelit options, and sizes suited to everything from cozy corners to spacious living rooms.
Think about the finished look you want, too. A broad tree gives you more room for generous ribbon loops and oversized accents. A slim tree can still look wonderfully full with decorations scaled to its narrower shape. Look closely at the branch arrangement, since some trees have an intentionally open silhouette that allows hanging ornaments to stand out.
Fluff Every Section Before Decorating
If your artificial Christmas tree looks sparse straight out of storage, give it a thorough shaping before reaching for decorations. Compressed branches can leave openings that become much less noticeable once the tips are properly separated.
Work from the bottom upward, completing one section at a time. Begin near the trunk and gently spread individual tips in different directions, following the tree’s intended shape. Continue outward until each branch has dimension.
Pay particular attention to the spaces where sections meet. These areas can form visible horizontal gaps when the branches remain flattened. Step back, check the outline, and adjust nearby tips to soften those openings. Follow the manufacturer’s shaping instructions, especially with molded branches or flocked finishes.
Bring Light Into the Branches
Lighting helps reveal the depth you’ve created through fluffing. When adding light strands, distribute them through the tree’s interior and outer branches so the glow reaches different layers.
Our Cluster Lights are a beautiful option for a richly illuminated tree. Their closely spaced LEDs create plenty of sparkle among the greenery. Weave strands gently inward and outward, checking the effect periodically for dark patches or overly bright sections.
If you have a prelit tree, check its lights before decorating and adjust surrounding foliage so bulbs remain visible. Follow the product instructions for any additional lighting, including connection limits.
Once your tree is shaped and illuminated, you’re ready for our decorating sequence: topper, ribbon, florals and sprays, then ornaments. This order gives each layer room to take shape.
Create a Topper With Shape and Volume
A full tree needs a topper that feels connected to the decorations below it. Combining several coordinating sprays creates height and width while introducing textures you can repeat throughout the design.
Try a mixture of upright branches, rounded berries, and broader leafy stems. Shape each spray before placing it, then vary the direction so some pieces reach upward while others extend gently outward. Flowers around the base help connect the topper to the tree’s upper branches.
Keep the proportions suited to your tree and ceiling height. You should still be able to recognize the tree’s tapered silhouette beneath the arrangement. If a favorite star or angel is part of your tradition, use a few coordinating stems around it to create a fuller setting.

Use Wired Ribbon to Build Fullness
Ribbon covers a generous area while adding softness and pattern. Wired ribbon is especially helpful because you can shape loops and billows that hold their form among the branches.
Choose coordinating ribbons with some variation in texture. A patterned ribbon paired with velvet or a subtle woven finish gives the eye different details to enjoy.
Work in manageable sections. Tuck one end into the tree, bring the ribbon forward into a rounded loop, and secure it farther down. Continue with a loose diagonal movement, changing the placement slightly as you work around the tree. We also recommend using short leftover pieces to fill smaller openings.
Check the ribbon from across the room before moving on. Distribute your main color throughout the tree, and reshape any loops that have flattened during placement.
Fill Open Areas With Florals and Sprays
Christmas flowers, picks, and sprays bring another scale of decoration into your design. Broad petals fill larger openings, while leafy stems and berries introduce texture between the ribbon.
One of our favorite techniques is combining two florals with two sprays to make a cluster. A leafy spray and a berry spray provide a lovely foundation beneath the flowers. Arrange the pieces together, secure their stems, and position the cluster among the branches.
Spread matching accents throughout the tree so they feel connected. For example, if burgundy flowers appear near the top, repeat them through the middle and lower branches.
Check each placement before adding more. A flower facing directly into a ribbon loop may disappear, while turning it slightly toward the room lets its shape contribute to the overall fullness.
Layer Ornaments From the Interior Outward
Christmas Ornaments make a tree feel more dimensional when they occupy several depths. Start with larger ball ornaments placed farther inside the branches, where they can help conceal the trunk. Then add smaller sizes and specialty pieces closer to the outside. We recommend reserving visible outer branches for favorites you want to showcase.
Mix finishes as well as sizes. A combination of matte, shiny, and textured ornaments creates variety, even within a simple color palette.
Choose sturdy attachment points for heavier pieces, and shorten hanging loops where needed to keep ornaments positioned in their intended spaces. Leave enough clearance for delicate ornaments to hang freely. As you decorate, check that your largest pieces are distributed across the tree instead of concentrated in one area.
Make the Final Adjustments
Before calling your tree finished, view it from the places where you’ll enjoy it most: the sofa, doorway, or dining table. A quick photograph can also help you spot uneven color distribution.
Look for specific areas to adjust. A visible opening might need a branch reshaped, a flower turned outward, or an ornament moved slightly deeper. Often, repositioning something already on the tree solves the problem.
Carry your decorating colors into the lowest branches, then finish the stand with a tree skirt or collar that suits the room.
Learning how to decorate a Christmas tree to look full gives you techniques you can enjoy year after year. Start with one of our beautiful artificial Christmas trees, take your time shaping the branches, and build each decorative layer thoughtfully. With a little arranging and your favorite holiday details, you’ll create a welcoming centerpiece ready for all the memories the season brings.