Your holiday display is about to be next-level magical! Our C9 Christmas Lighting Kits make it simple to create a professional-looking Christmas light installation at home. Whether you’re dreaming of warm white elegance, cheerful red and green, or icy cool white and blue, we’ve designed everything you need to get the job done—no guesswork required.
In this decorating guide, we’ll show you exactly how to install your C9 Christmas lights so you can spend a little less time puzzling over cords and more time enjoying that cozy holiday glow.
What Are C9 Lights Again?
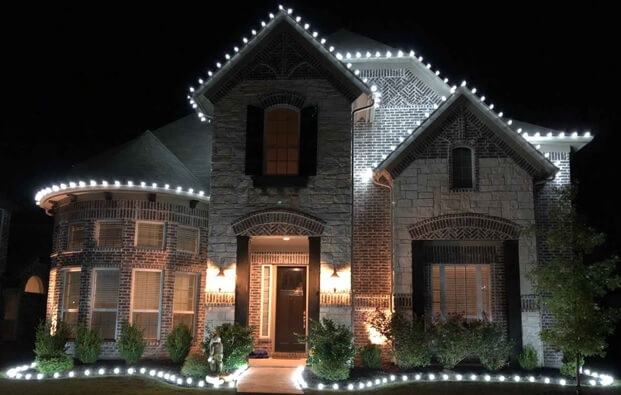
C9 Christmas lights are the timeless classic when it comes to outdoor holiday decorating. Larger than standard mini lights, their bold, teardrop-shaped bulbs create that iconic glow we all associate with a traditional Christmas display. Because of their size and brightness, C9s are especially popular for outlining rooflines, railings, and driveways, giving homes a crisp, professional look that can be seen from a distance.
When you’re looking for the classic look, with a custom feel, this is it! While it’s straightforward on how to install them, it does take some technical knowledge, which we’ll share below!
We love these lights because they strike the perfect balance between vintage charm and modern durability, offering both LED efficiency and the nostalgic warmth of vintage Christmas lights. For homeowners who want that classic Christmas feel (the kind that instantly brings back memories of childhood, or your favorite holiday movies!) C9 lights remain the go-to choice year after year.
The C9 Starter Kit
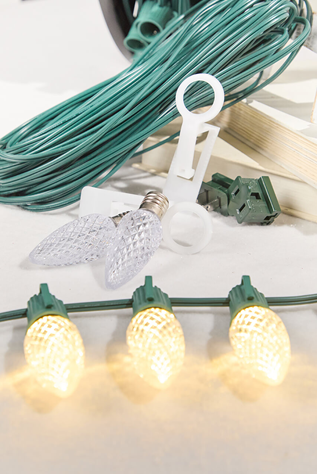
If you’re wondering what a starter kit is or what you need with C9 Bulb Christmas Lights, we make it simple! Every one of our C9 light starter kits includes:
- Bulbs: The exact number of bulbs to match your cord length. (100 ft cord = 100 bulbs. If you choose two colors, you’ll get a 50/50 split.) Larger kits, like 250 ft or 500 ft, come with the corresponding bulb count.
- Blank Lamp Cord: Perfect for bridging areas where you don’t want lights, like gaps between rooflines or sections of your yard.
- Quick-Connect Plugs: Male and female “vampire plugs” so you can cut and customize your light strands to the exact length your home needs. This is essential for stringing the lights to match your house’s dimensions.
- Smart Clips: These handy clips hold each bulb snugly and allow you to slide them under shingles or attach them to gutters for that perfectly straight, polished look.
With these components, you’re fully equipped to create a stunning display.
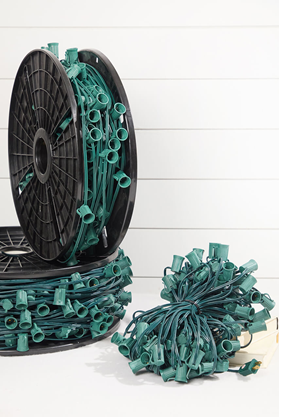
Step 1: Cut Your Cord to Size
If your roofline doesn’t match your cord length exactly, no worries! All of our C9 cords can be cut. For example, if you only need 87 feet out of a 100 ft cord:
- Always be sure the cord is not plugged in while cutting. Safety first!
- Use wire cutters to cut the cord at a slant.
- With a box knife, make a small incision to separate the two wires.
Step 2: Add Your Plugs
Each wire has a ribbed side (the ground) and a smooth side. The ribbed edge should line up with the wide slot on your plug. Here’s how to do it:
- Identify the “teeth” inside the plug: they puncture the cord to make the electrical connection.
- Slide the ribbed edge into the correct side, then push the plug cap on firmly.
- Attach a male plug to one end and a female plug to the other.
With this simple method, you’ve just created a custom-length cord tailored to your home.
Step 3: Clip and Bulb
Now it’s time to install along your roofline:
- Before inserting bulbs, slide a smart clip onto each socket.
- Clip as you go, making sure each bulb is held tightly.
- Smart Clips easily tuck under shingles or grip gutters, giving you those crisp, professional lines.
Once clipped, screw in your bulbs and watch your display come to life!
Step 4: Light It Up!
That’s all there is to it! Plug in your strand, step back, and admire your handiwork. With our C9 lighting kit, you’ve created a dazzling display that’s built to last all season long.
We hope this guide helped you feel confident about installing your C9 Christmas lights and creating that classic holiday sparkle right at home. For even more inspiration and tips, be sure to bookmark the Decorator’s Warehouse blog and don’t forget to come visit us at our Arlington, Texas showroom this season!
[https://www.youtube.com/watch?v=VZ_rY6_iPog]
You can also follow along with us on social media for festive ideas all season long. And if you’d like to see this tutorial in action, check out our full video on YouTube. Don’t forget to like and subscribe!