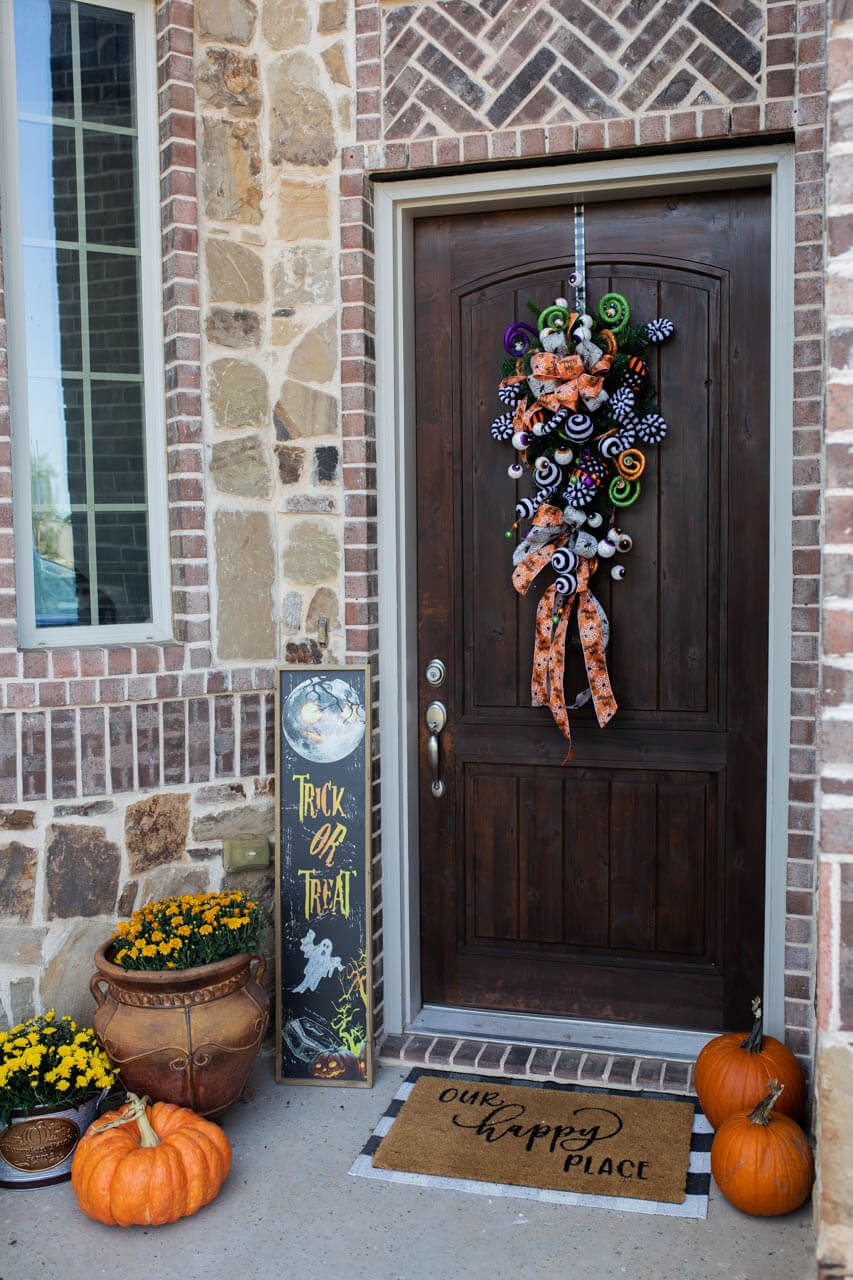
Halloween is such a fun and fanciful time — and Halloween door decor can range from simple to simply amazing! We love taking out all the spooky things and finding new ways to incorporate cute themes throughout our house.
Are you going full-on haunted house and need an epic door element? Or do you want to keep it simple? For either scenario, if you’re looking for a DIY Halloween statement piece that gives lots of visual interest to your front door, this is it.
Fun and Spooky Halloween Door Decor
This swag is the perfect silly, fun, and whimsical accent for the front of your home. There’s nothing more simple and streamlined than a single decoration piece that you can put together in about 30 minutes to 1 hour! Let’s get started making your home more intentionally magical during this fun season!
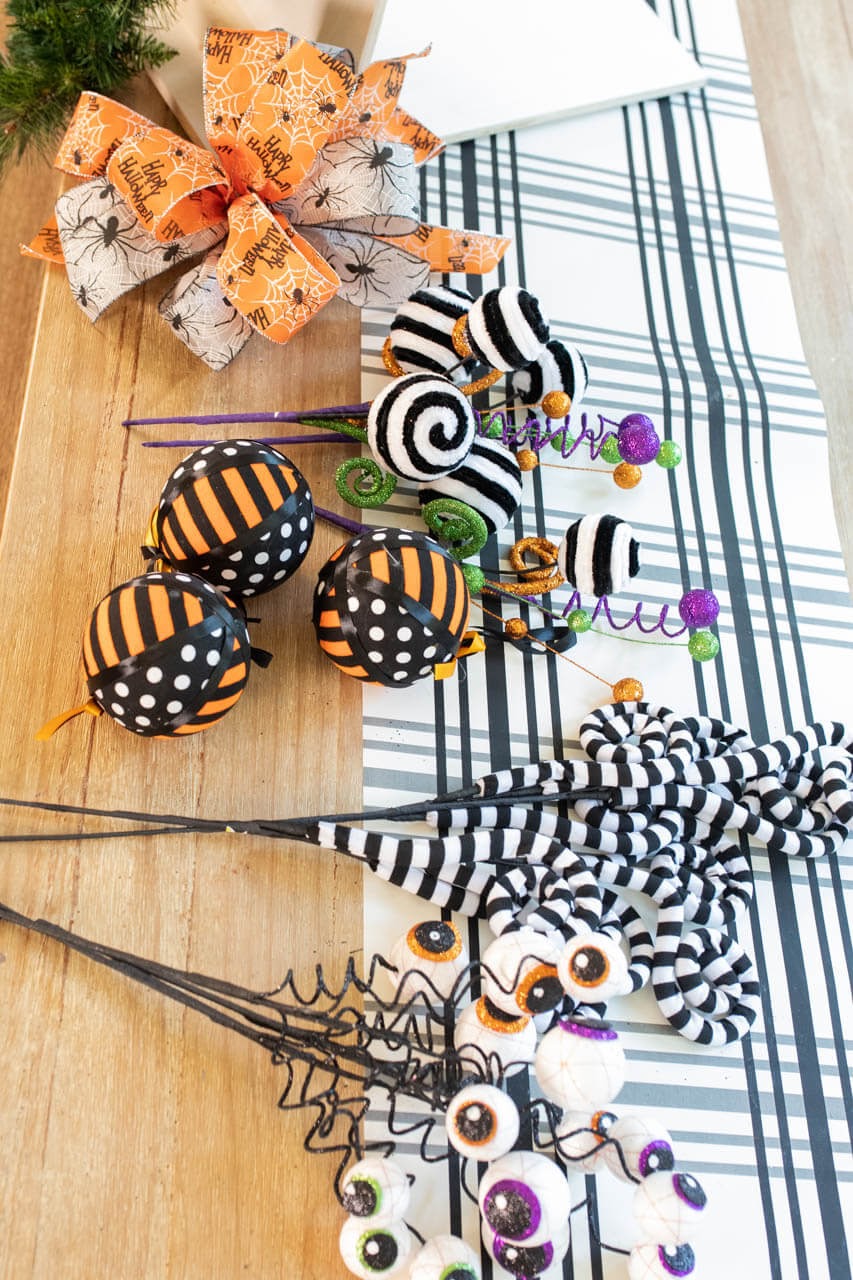
You’ll need the following items to put this swag together —
- (1) Roll of Spider Ribbon
- (1) Roll of Orange Boo
- (3) Polka Dot Halloween Ornaments
- (3) Sprays with Striped Ball and Curlies
- (2) Black and White Striped Curly Sprays
- (3) Eyeball Sprays
- (2) Large Curly Eyeball Sprays
And if you want to shop for other elements, here's more inspiring fall and Halloween home accent pieces. Let your imagination take you away with all the incredible possibilities! Be sure to have hot glue and a great pair of scissors on hand as well — let’s get crafting!
Steps to make your Halloween Door Decor
1. Fluff the base
Imagine your swag as your canvas — you’ll need to fluff the branches and prep it to hold all of the crazy crafty things that are coming its way!
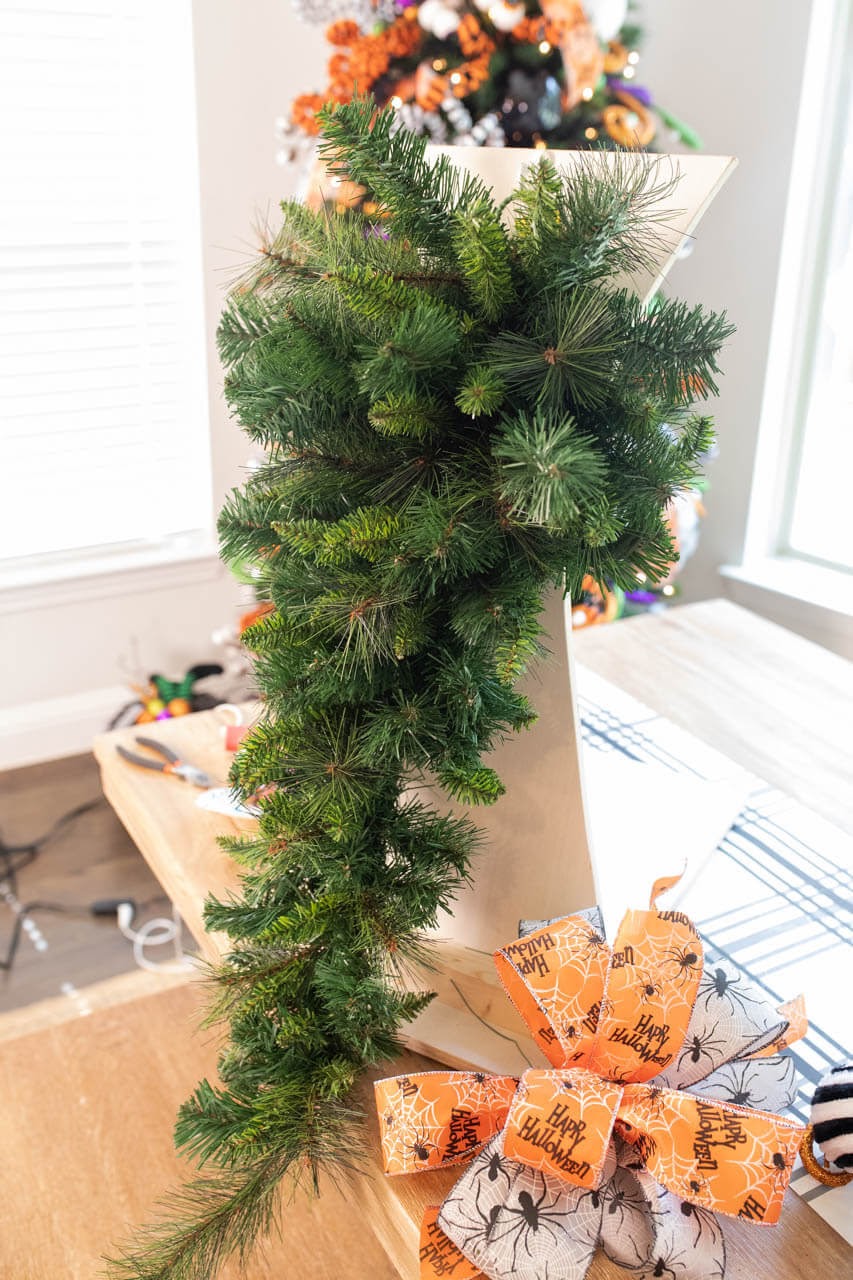
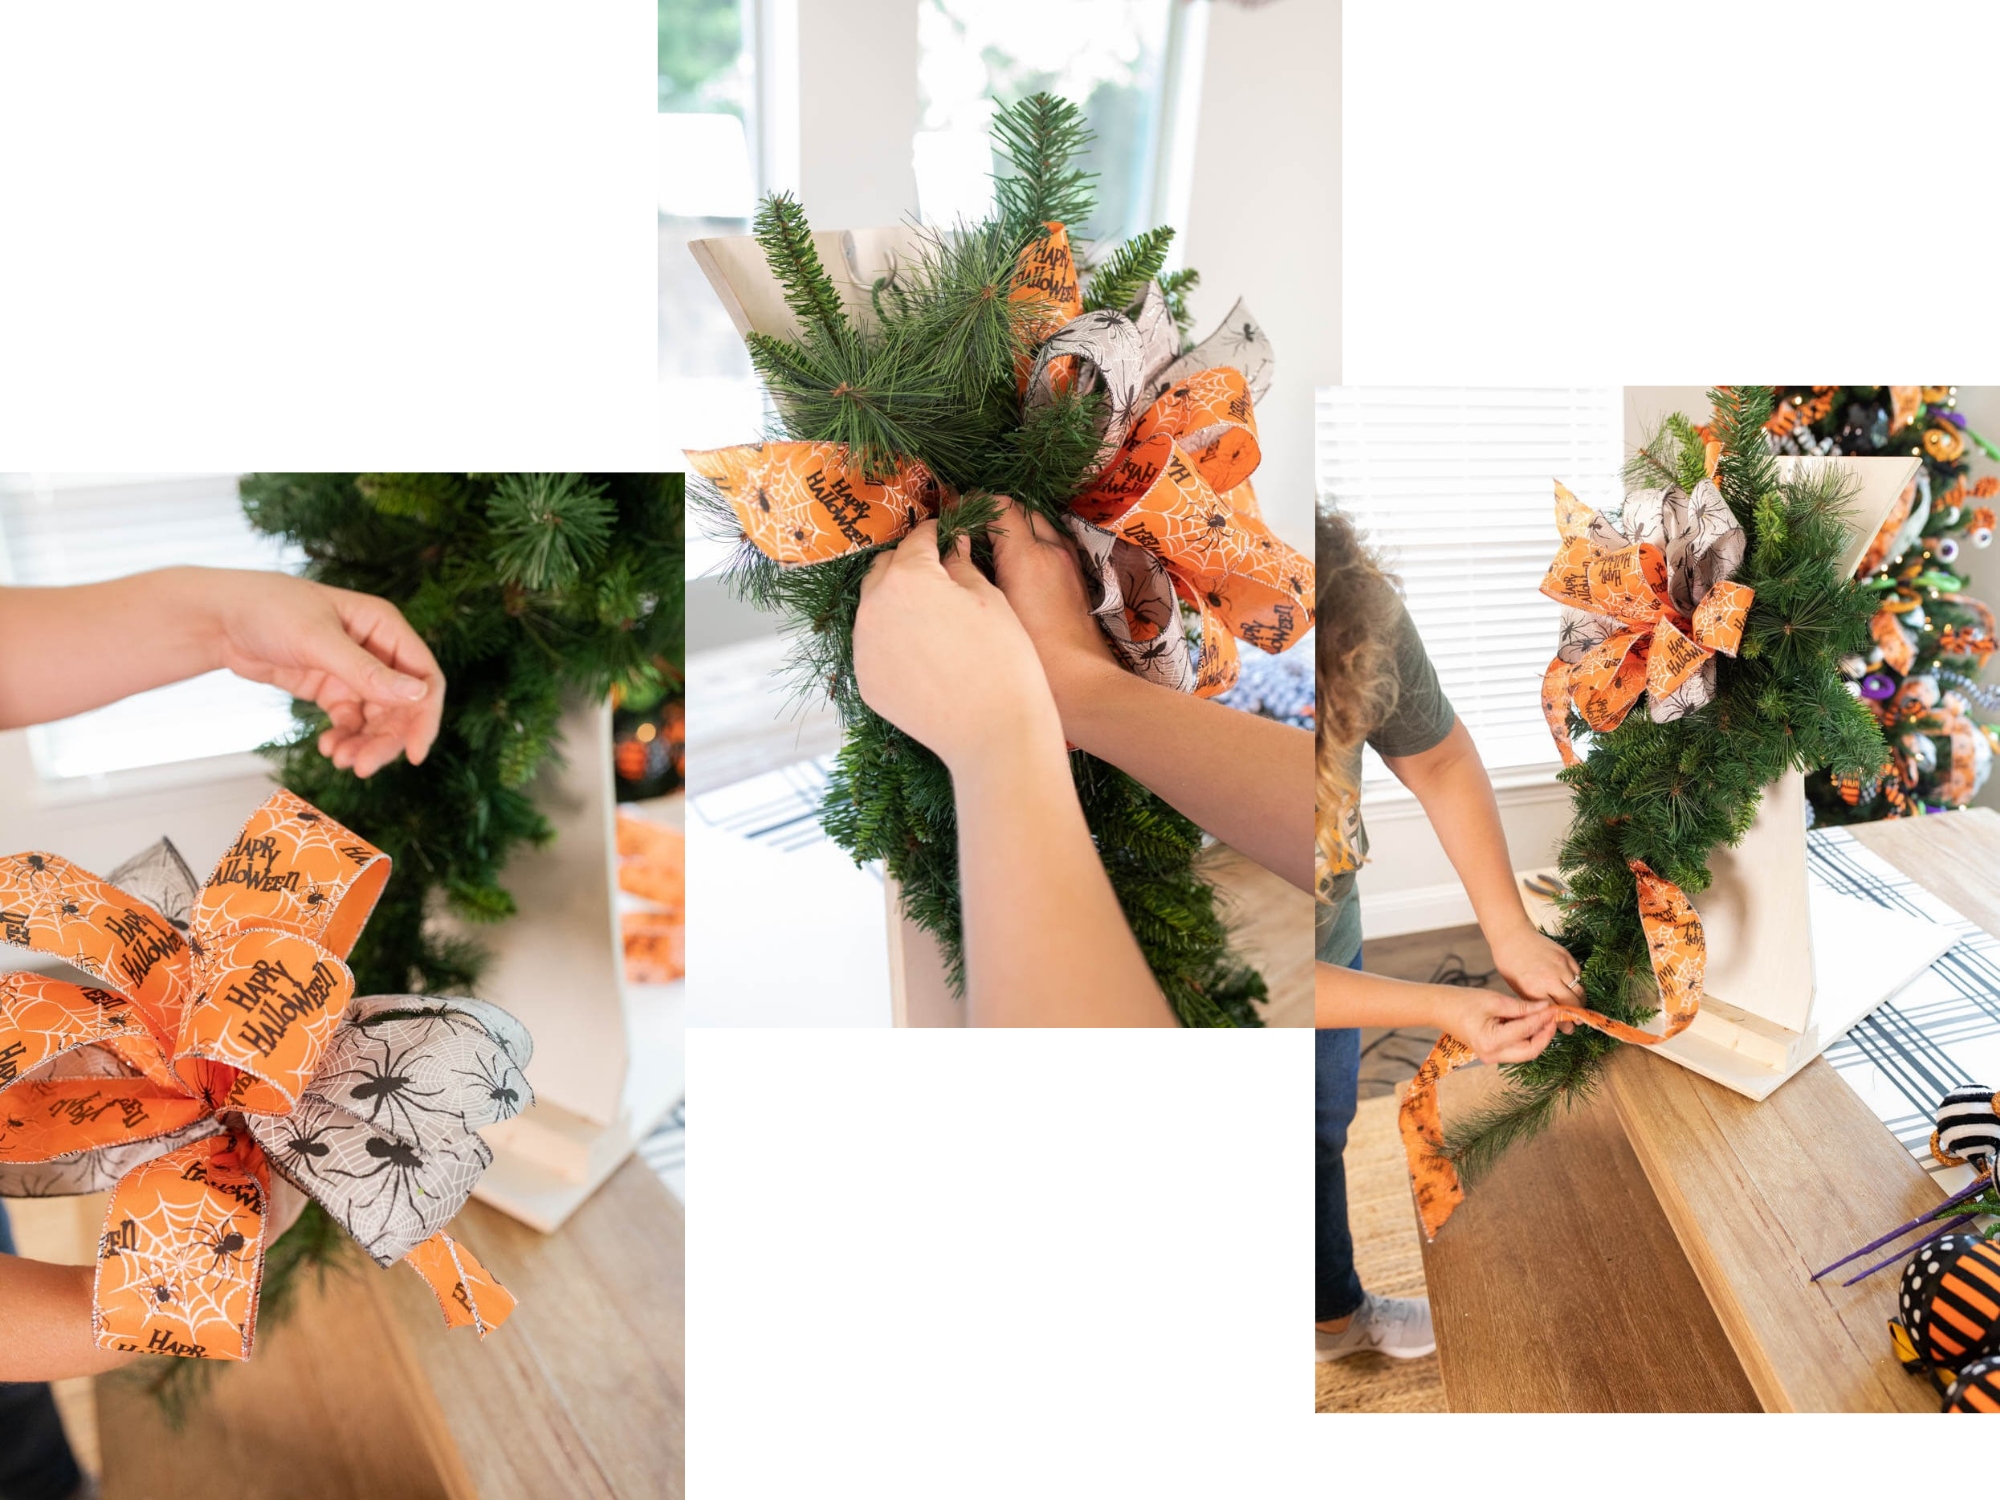
2. Add ribbon
You’ll craft a seven-loop bow with the neutral and black ribbon for this design, weaving the ribbon through and creating one larger loop on each side.
Then, you’ll create a three-loop ribbon and secure it on the bottom section.
Here is a great bow making tutorial to help you with this central piece —
Once you have your bow complete, find the best place for it on the swag, hold in place, and wrap it with one of the branches to secure! Take some of your ribbon and weave it through the remainder of the swag, creating full loops! You can also craft a smaller bow to attach to the bottom of the swag for a full and cohesive look.
3. Add picks & sprays
Now you’ll take all the fun googly eyeballs, ornaments, and wizamadoodles? Whatchamacallits? Whatever they are — you’ll look for the natural break and cut the sprays to form smaller pieces!
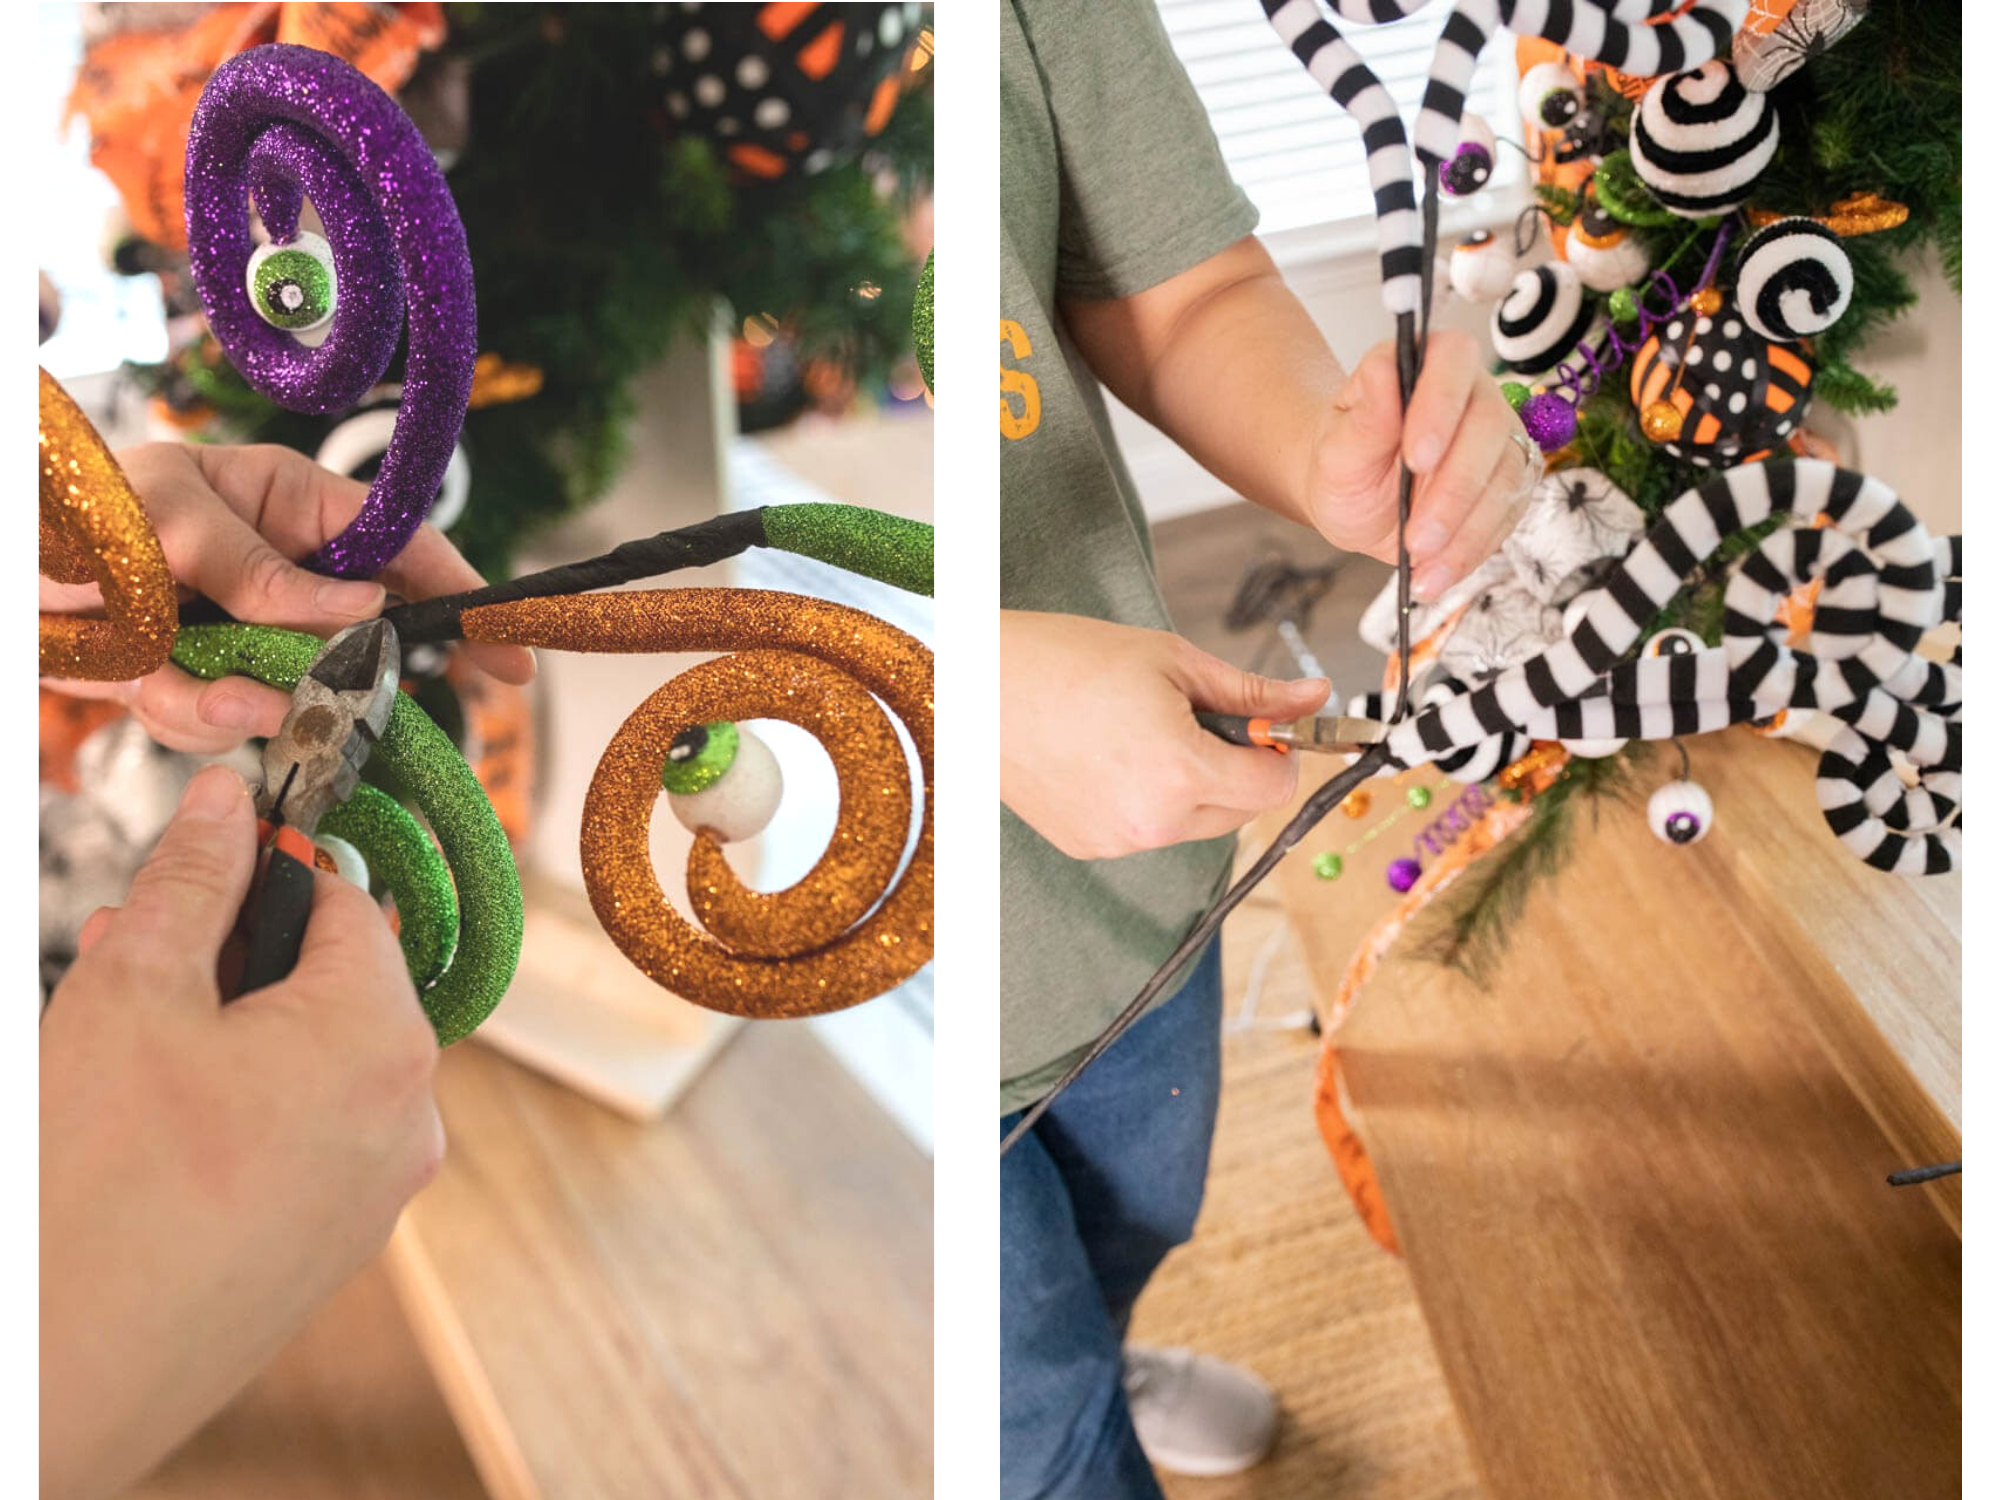
To insert the picks, find a branch, run the pick up into the base, and twist to hold it in. Add them in a zigzag formation, particularly the eyeballs and the striped ball picks. And fill in the gaps with the purples and greens for pops of color.

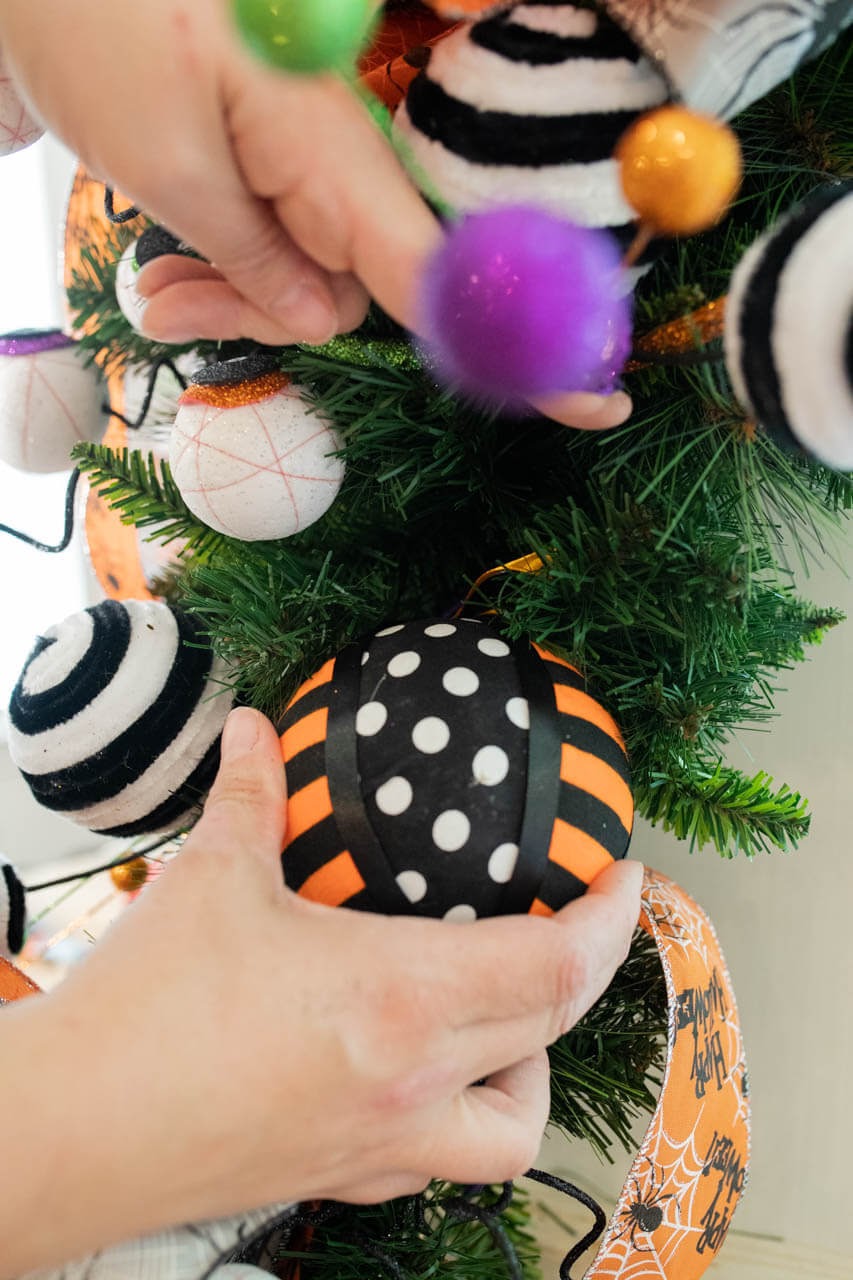
Get a visual for where you’ll place the ornaments — be sure your glue gun is warmed up and ready for this next part!
4. Glue your ornaments in a zigzag formation
Using the same zig-zag formation, add a generous amount of glue to the ornament and insert and hold it in for a bit to make sure it adheres to the swag.
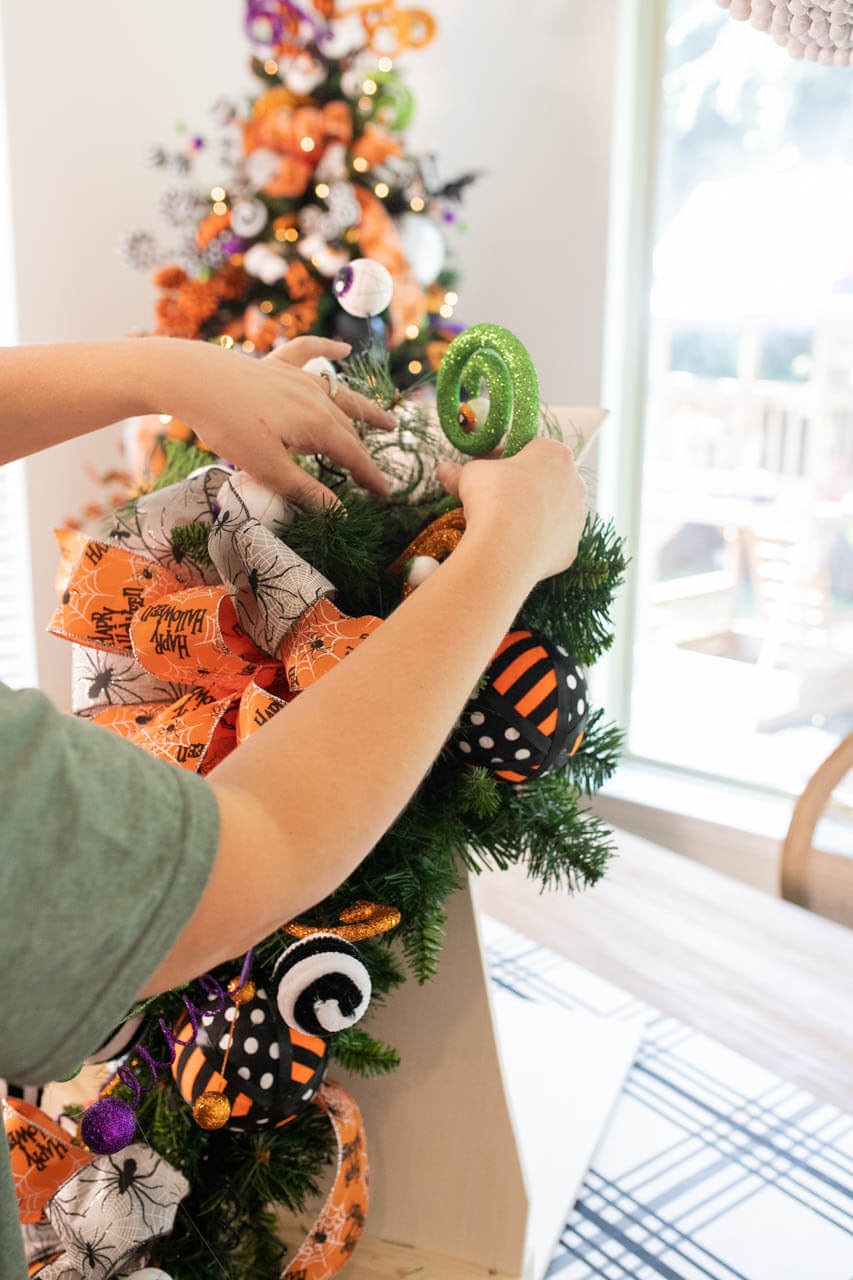
5. Finish filling any holes with additional sprays
Here comes the entertaining part! As your swag is looking full, find the gaps where it needs a little more, and have fun adding in the other eyeballs, polka dots, and curly picks for a full look.
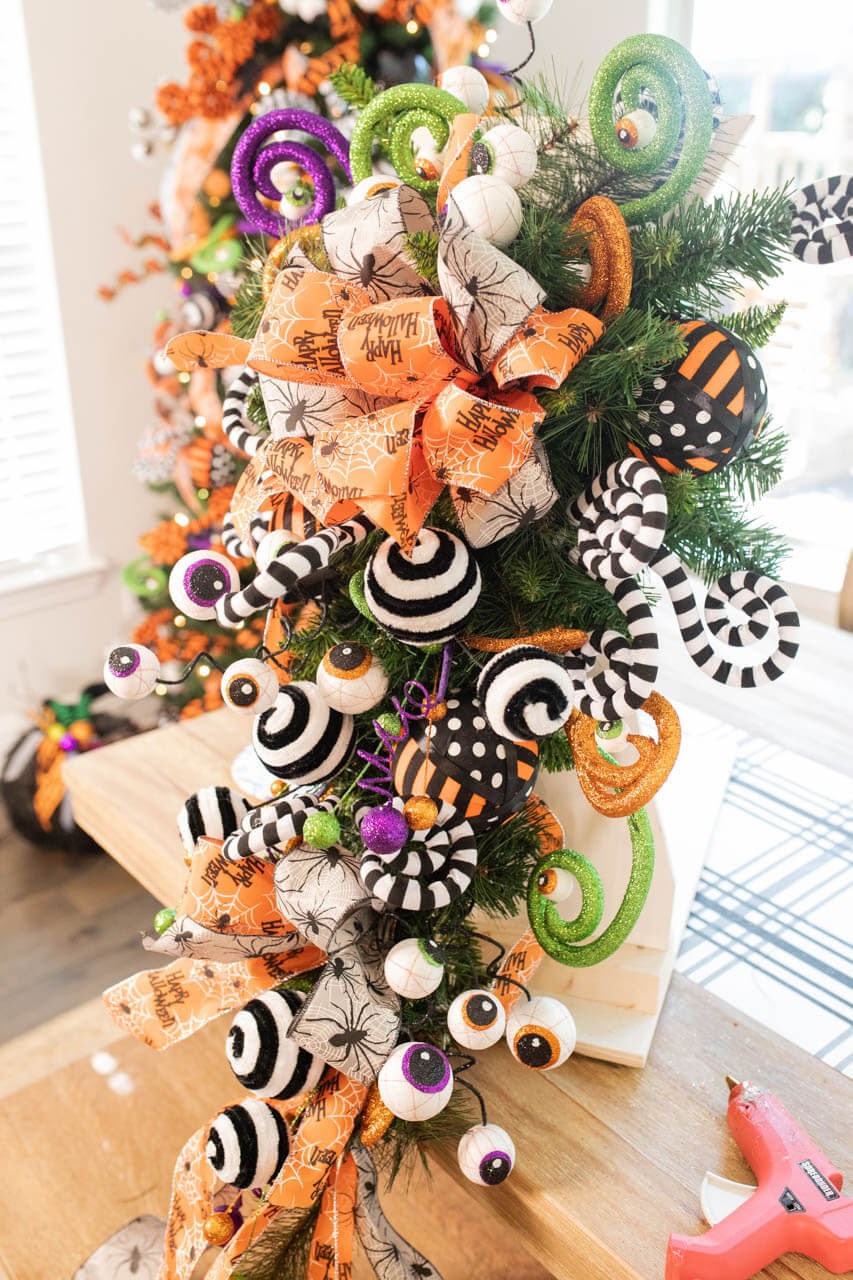
When your swag is put together, the last thing to do is hang your amazing work on your door and wait for the giggly trick-or-treaters to laugh at your amazing Halloween door decor! With just a few pumpkins, a cute mat, a board sign, and some mums on your front porch, you’ll have the perfect recipe for decorating a simple but impactful front door for Halloween.

We hope you have as much fun as we did putting together this accent piece and that you enjoy it for years to come! Need more inspiration for decorating your front door? Head on over to our previous fall post or shop the store today!