When you’re looking to refresh your holiday front door decor, nothing compares to a beautiful swag piece! We’re going to take you through four simple steps to create your very own farmhouse-inspired teardrop swag with our friend, Maymay Helms at Maymaymadeit.com!
Simple Steps to Make Your Own Swag
What is Christmas Swag?
A swag can be an unforgettable statement piece on your front door, on a secondary focal point (lamp, door, mailbox, etc), or incorporate throughout your home.
Traditionally, “swag” referenced any architecture or decoration that loops down and is bunched together, embellished with fruit, flowers, and foliage.
In this modern twist, we start with a Christmas teardrop base, attach mixed pine and other elements, and bring together an exquisite celebration of your favorite designs!
How do you make one?
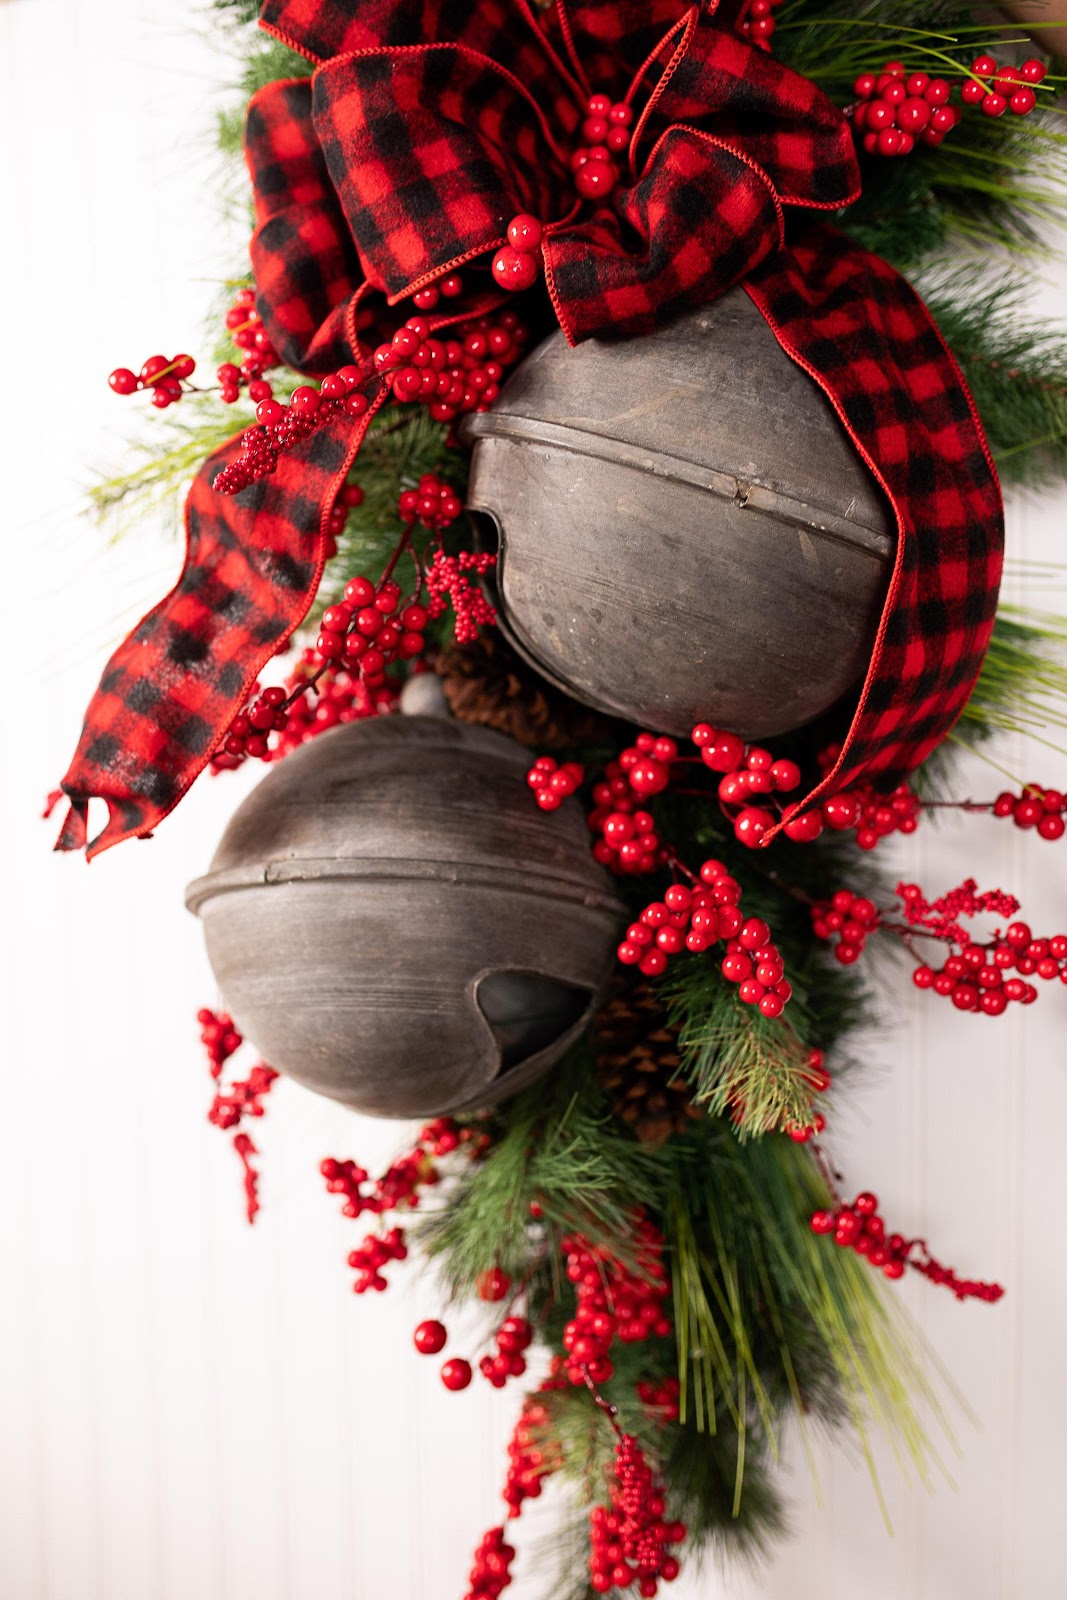
We’ve made crafting your own piece simple! This swag features deep red and rustic elements that bring the spirit of Christmas to your front door - or any other place in your home!
Watch Maymay’s
tutorial and purchase your own kit to replicate this exact item.
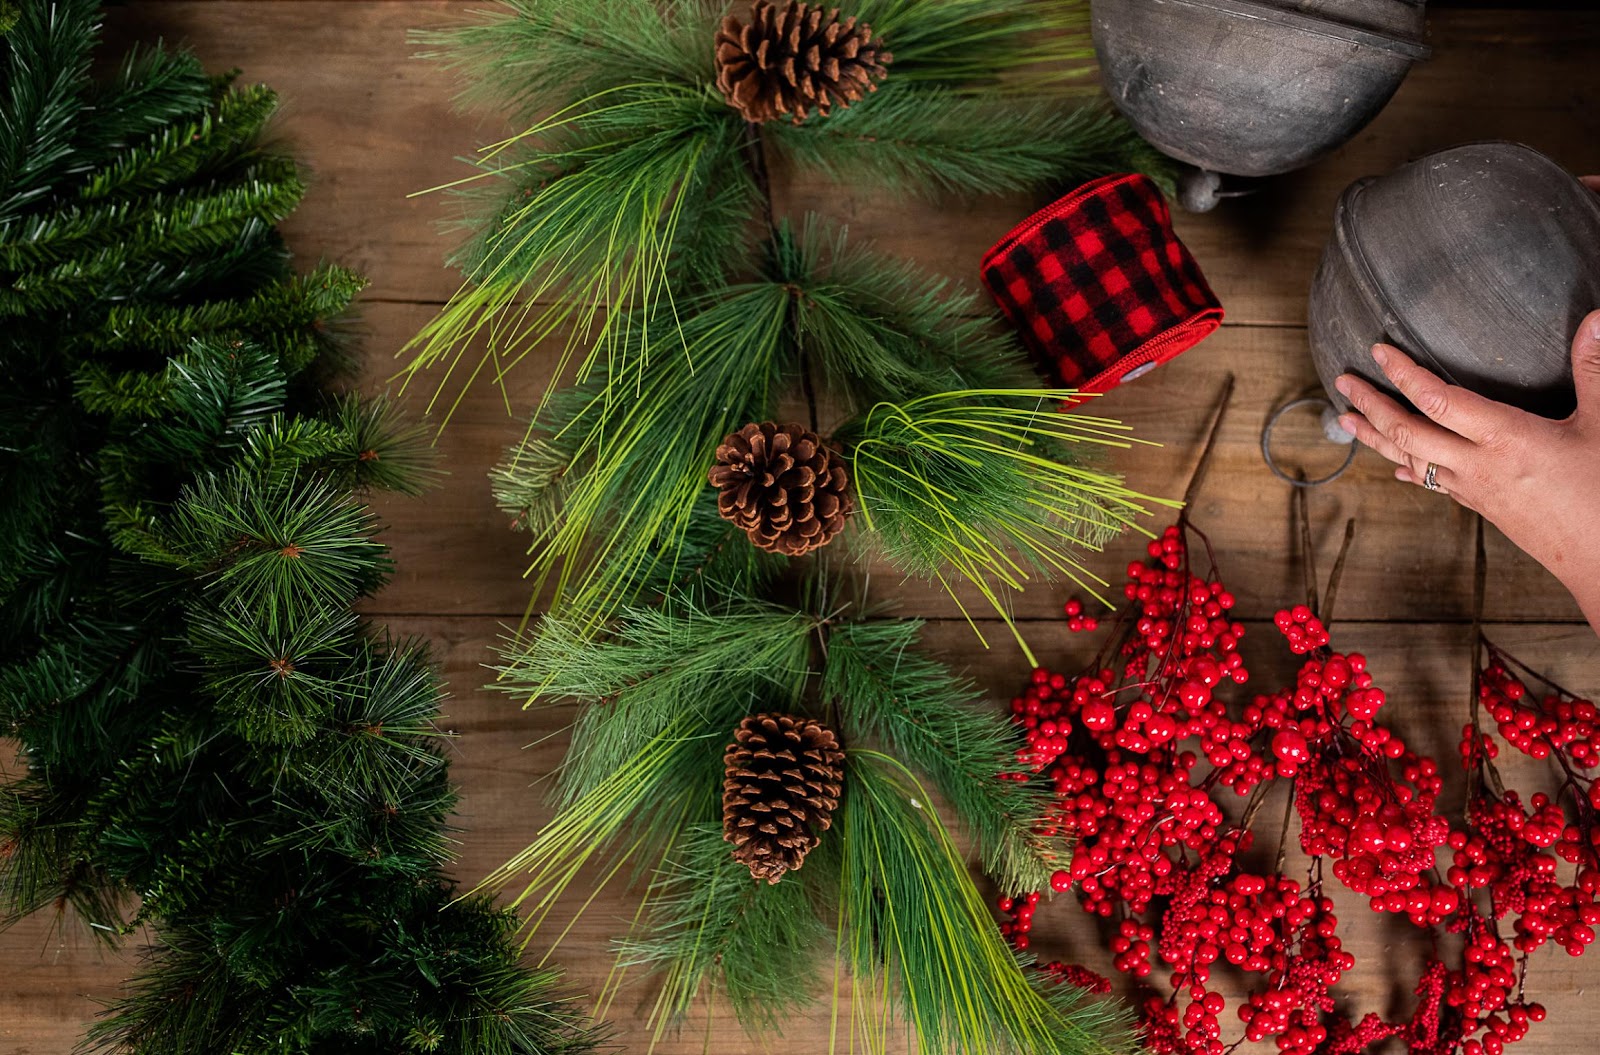
For your convenience, we have each step listed below, with the time marker that correlates to Maymay’s instructions in the video. We hope you enjoy the creative process as you assemble your very own farmhouse swag!
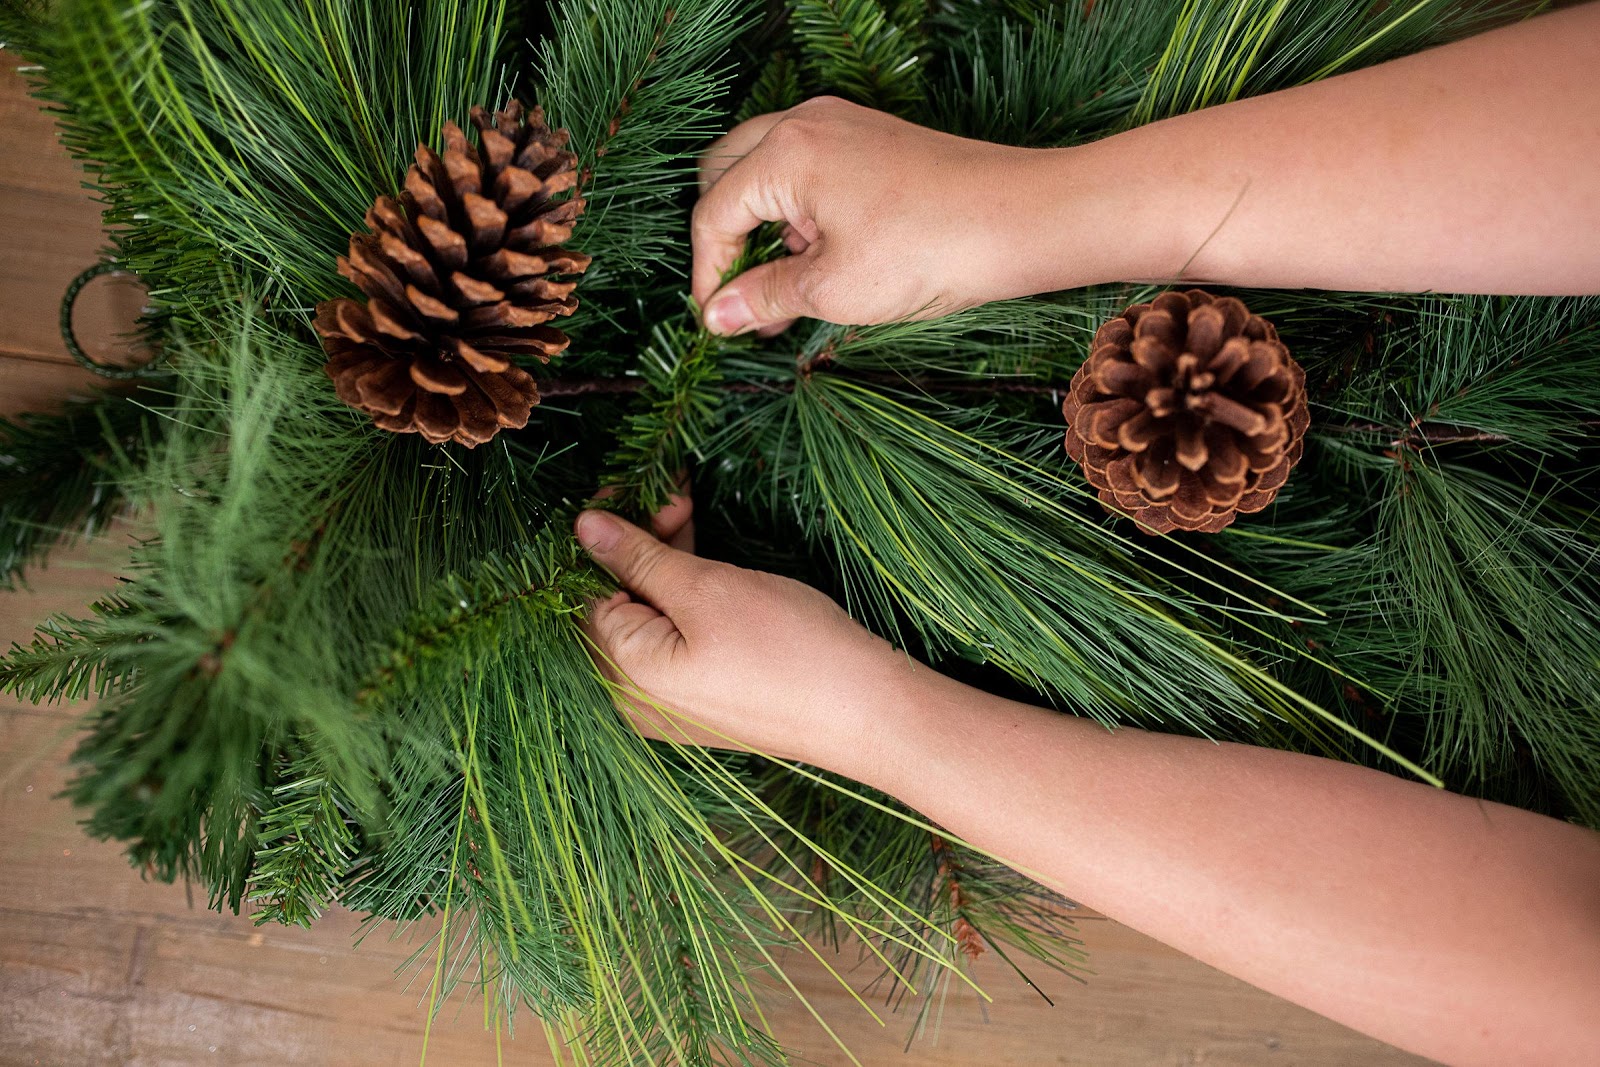
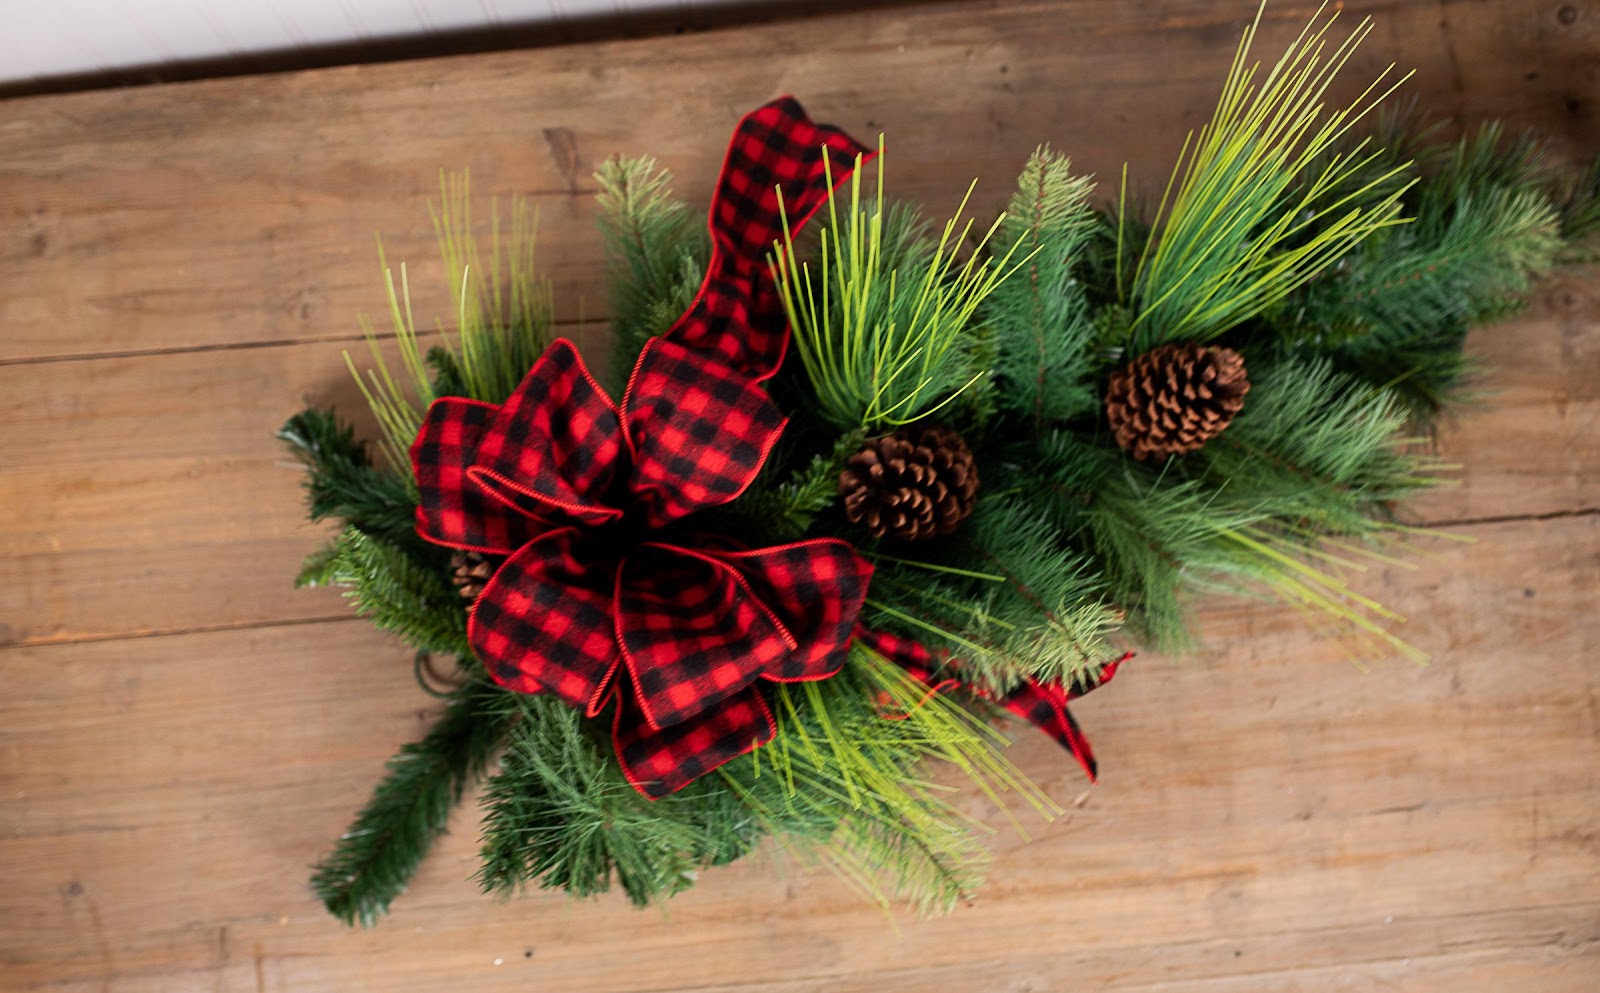
Step 1 (1:25) — Join two teardrops together to create the base.
- Flatten the back of the larger teardrop and establish a flat surface to work on.
- “Fluff” the evergreen branches, straightening them and creating the look of a Christmas tree branch.
- Add the smaller pine cones swag to the top of the base. Take some of the bottom swag branches and twist together, in 3 to 4 places.


Maymay’s Tip: You can choose to not use hot glue so you can reuse the swag elements and recreate a new look at a later season!
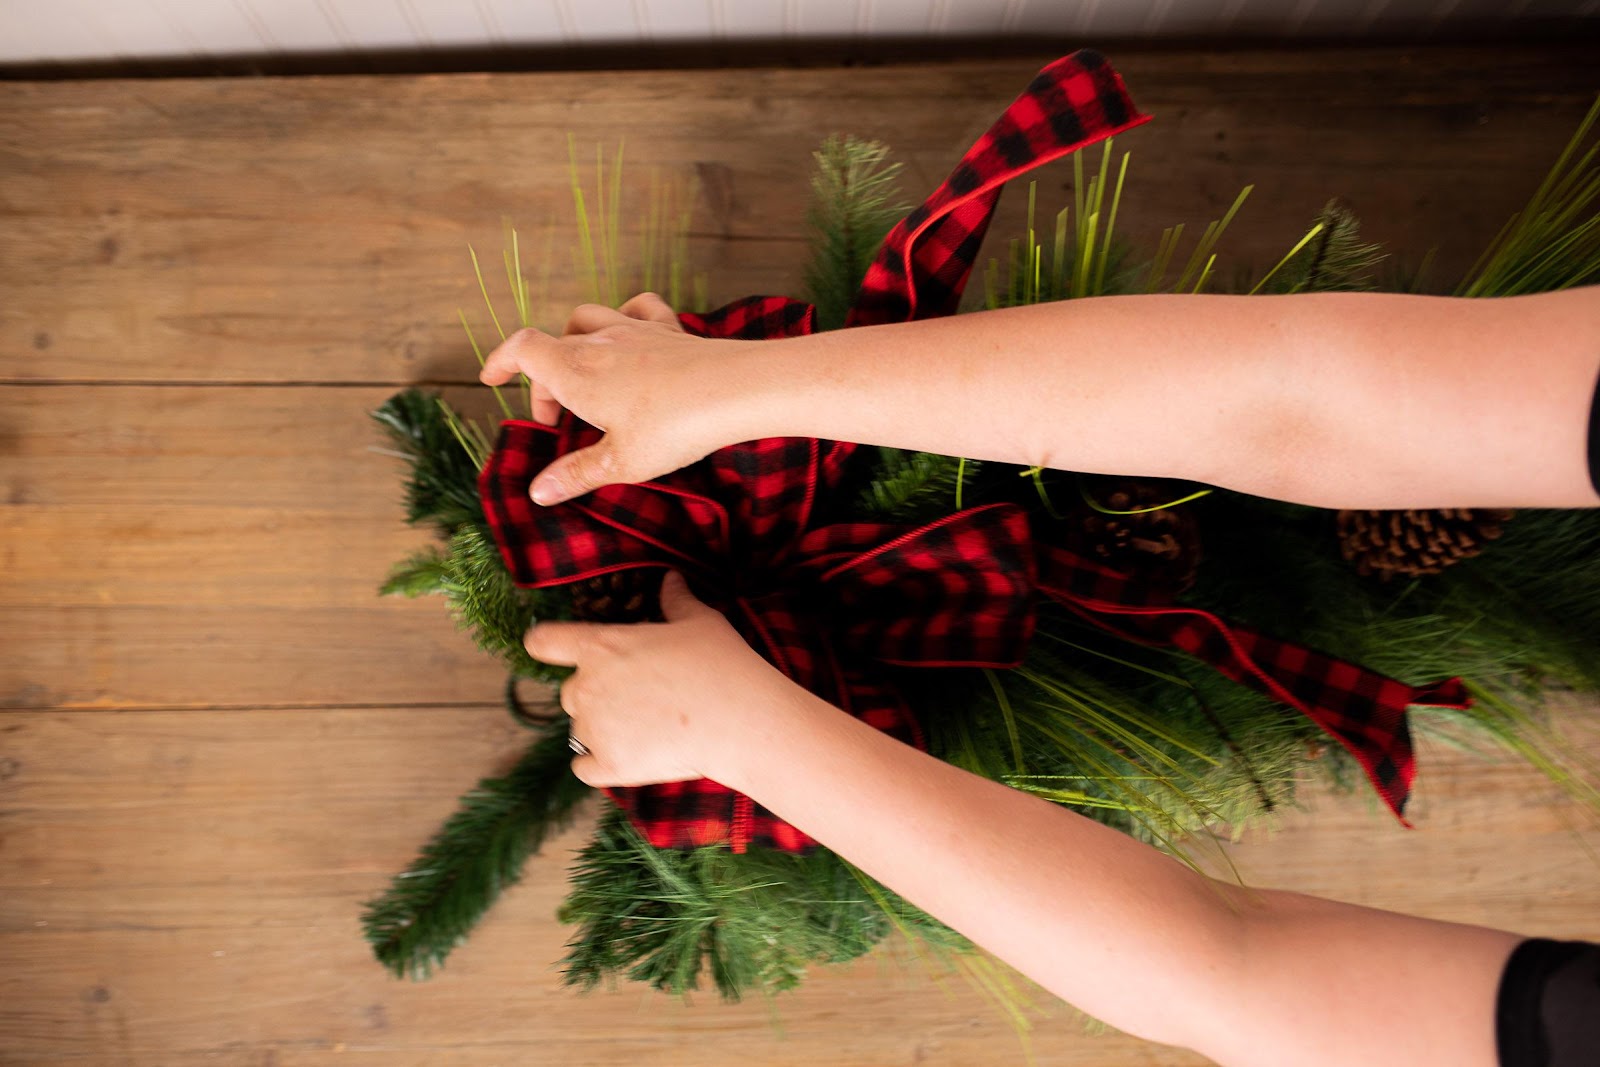
Step 2 (3:05) — Create a bow
- Make one loop to get started. Place the loop over the middle of the swag to see where it falls. Adjust to get the width you’d like.

- Hold the middle securely, adding the second loop and continue once you have the right size. We recommend eight loops for a piece of this size.
- Be sure to twist the ribbon before making each loop if you are using a single-sided ribbon!
- Make sure all loops are approximately the same size before attaching.
- Turn the swag to the side to see how long you’d like the ribbon strands to hang — loop that last piece of the ribbon, bringing it back up to the main bow.
Maymay’s Tip: Zip tie the ribbon if you’d like to reuse it on another project! Be sure the zip tie around the ribbon (or whatever you’re securing it with) is tight, ensuring that the bow will be as structured as possible.
- Cutaway the piece of ribbon that connects to the roll.
- To create a dovetail end, fold the long looped section, starting about an inch from the end, and cut at an angle — with sharp scissors — from the inside fold crease to the wired edge.
Step 3 (8:57) — Add the focal elements
- Take the new bow and wrap the second zip tie around the center of the swag. Tighten the zip tie to hold.
- Fluff the bow and move the tails to the side.

Maymay’s Tip: Wait until the end to fluff the bow — as you’re adding pieces, it will look a little rough! But once you’ve finished adding the elements and have it hanging, you’ll be able to finalize the bow’s look.
- Under the bow, pull out an evergreen branch and wrap that piece around the bell’s hook. Secure in place with another evergreen piece or with some floral wire.

- Add the second bell.

- Hold the swag up to be sure the bells are where you’d like them to be.
Step 4 — Add the faux berries (12:30)
- Find a good spot to add your red berries. Send the pick up into the greenery, twist with an evergreen stem, and spread the floral pieces to incorporate into the swag.
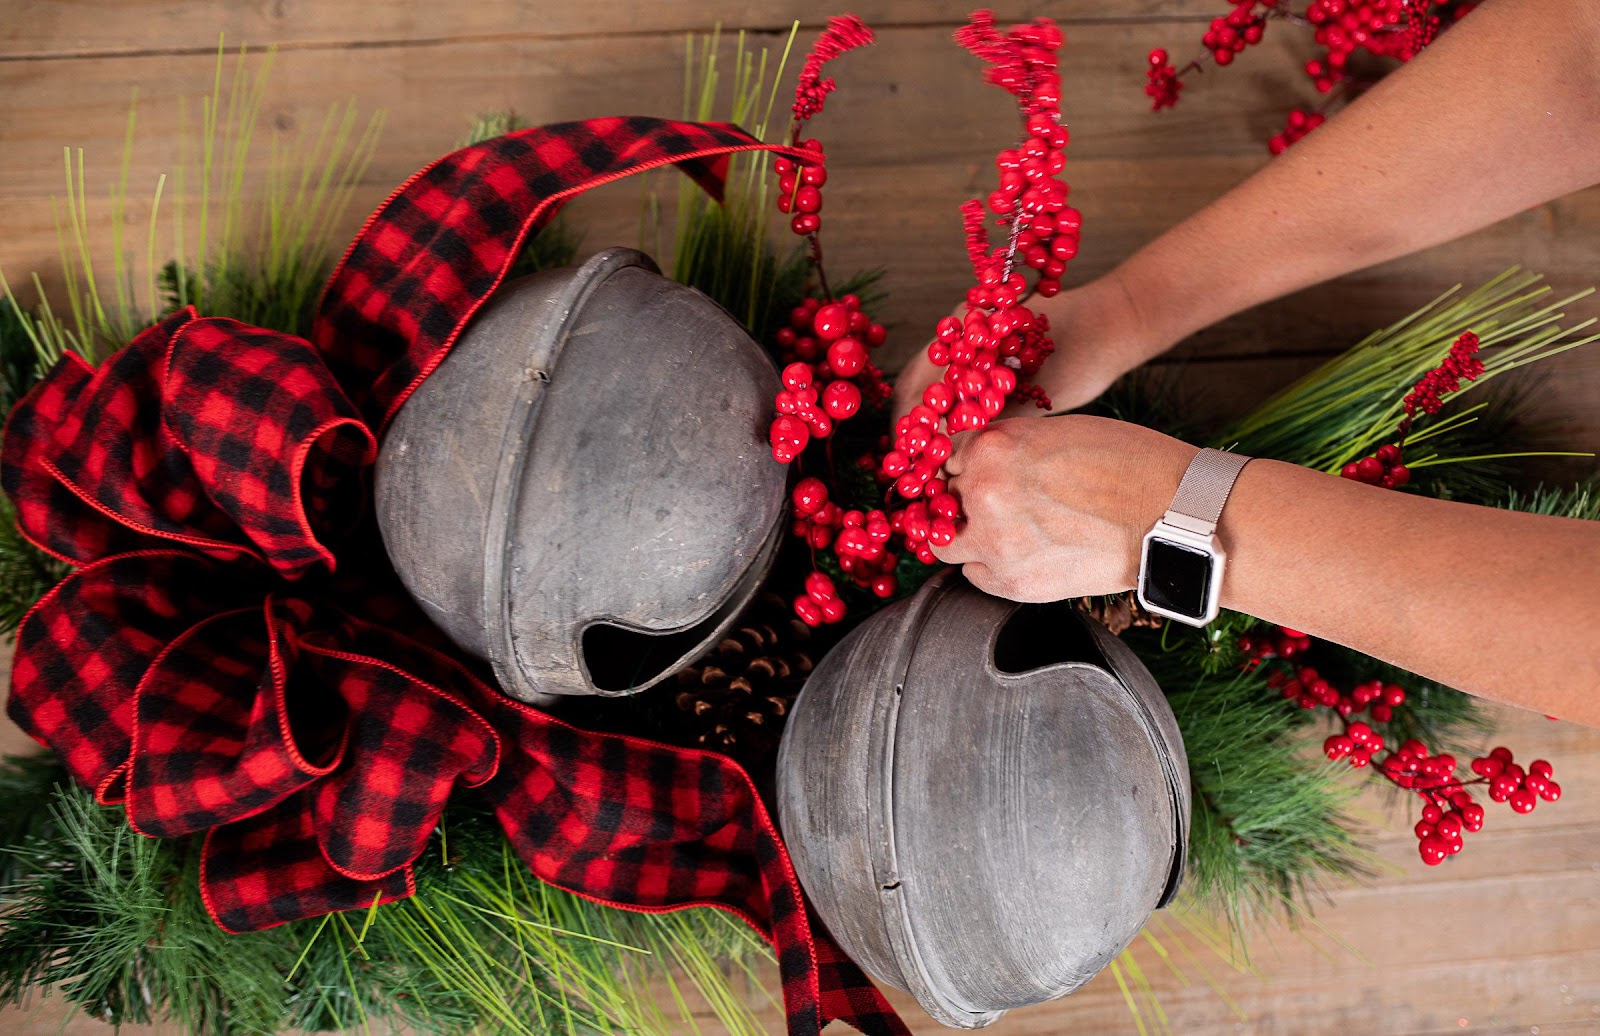
- Continue with the remaining three picks, balancing and embellishing the piece.
Maymay’s Tip: If you decide to use hot glue, cover the stem with the glue, and fasten it to the swag base.
- If you decide to break apart the pick to incorporate in smaller increments — divide at the natural break.
- Once you hang the swag, fluff, and move elements as needed!
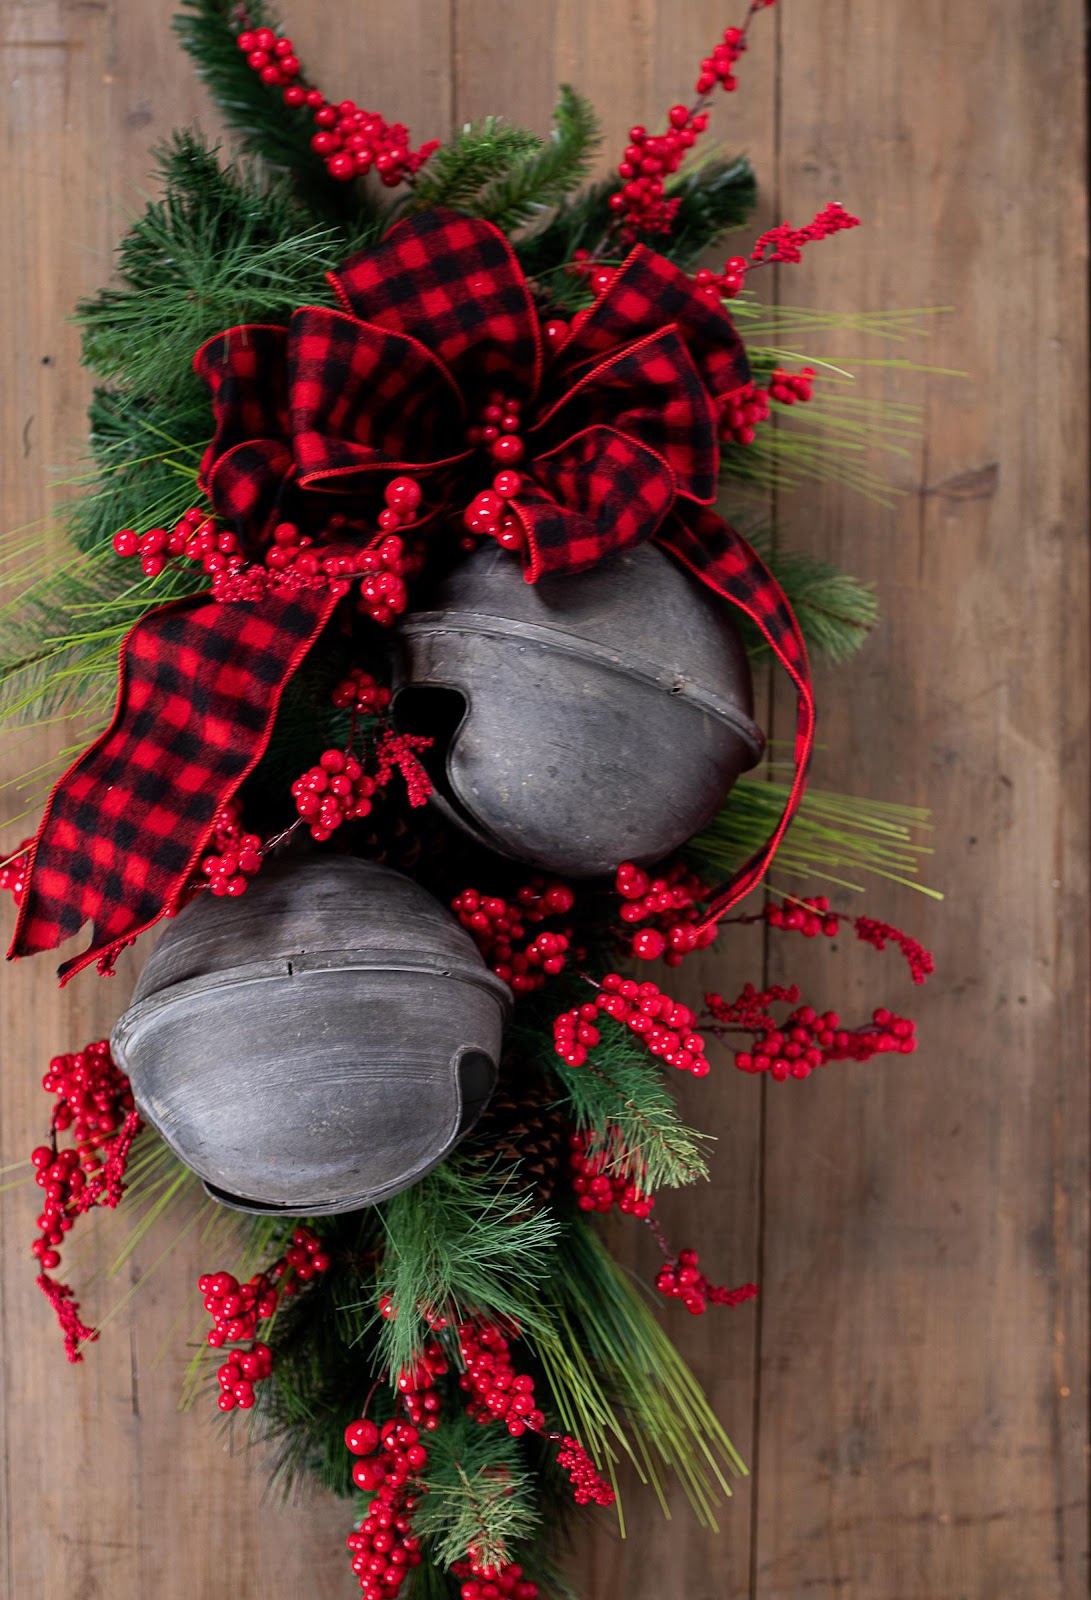
And there you have the four simple steps to crafting your own Christmas pine swag for your holiday decor! We’d love to see your finished product - post your swag on Instagram using the hashtag #dwchristmas to share the Christmas spirit with your friends and family!